
Here I will try to clear up your doubts and confusion about creating a Blogger menu, a Blogger drop-down menu, a Blogger submenu, etc.
You can also call it the navigation menu with the help of categories in Blogger. So I'll show you how to create categories in Blogger, how to create subcategories in Blogger, etc.
Before you start creating a menu for your website on Blogger, the first thing you need to do is choose a Blogger Theme.
Without a valid, responsive, and SEO-friendly (search engine optimization) theme the navigation menu will never have the look you would expect from a blog/website.
Using this template and/or other templates (which you can get from the same website) makes the process of creating Blogger navigation menus very, very simple.
What are the categories on the blogger?
Categories are labels that you create when you post content. In Blogger you can call labels, categories for your blog/website.
So here I will show you how to use labels or categories to create a blogger navigation menu.
Are you a newbie in blogger?
Once you start your blog/website on Blogger, you will need some posts and labels to place on your posts.
However, to set the blogger navigation menu, you can create a blogger navigation menu with one post.
All right, we'll see!
How do I create a drop-down navigation menu with submenus in Blogger?
First of all, you need to create some relevant labels.
As I said, labels are like categories in bloggers. But first, you want to set up your Blogger homepage and now you are working on creating a navigation menu.
So when you have made some posts or have no posts on your blogger. This means you have multiple labels or no labels at all.
So allow some labels you create when creating a post.
However, if you don't have any Blogger posts, you obviously don't have such a label and you need to create that label first.
But why do you need a bunch of posts to create different types of labels or categories to create a blogger navigation menu to work with?
You can create a blogger navigation menu with a single post!
Step 1: First, you need to install the theme (template) that I will use in this process (shown above). Or you can use a different theme from the same website or another trusted source that gives you mega menus and options.
How to install theme on blogger or change theme in blogger
Step 2: After installing the template you have chosen for your blog/website. Let's go to the "Post" section and make a post.
In this article, you will create all kinds of labels that you want to create as categories, or you will need to create a navigation menu for bloggers later on.
In a single post, regardless of the post, but the labels you create contain the type of labels you want to use in the navigation menu or submenu.
Also, you can only create posts with titles and create and publish all labels.
This is a very, very simple method for those unfamiliar with HTML, coding, and so on.
Now,
Add label to create a drop-down navigation menu with submenu in Blogger?
Step 3: Make all labels visible or go to your blog and go to this post (which you published) and you will see all labels in tag form at the end of this post.
(If the tag doesn't appear, you'll need to make all tags visible on your blog by adding a tag gadget.)
Step 4: Go to Blogger dashboard and click on the Layout section.
Here you will see the main menu options and this is where you need to click on Edit Link List.

Here you can edit pre-installed menus or submenus, mega menus, etc. through templates or you can delete them all and create a drop-down navigation menu with submenus in Blogger that's yours.
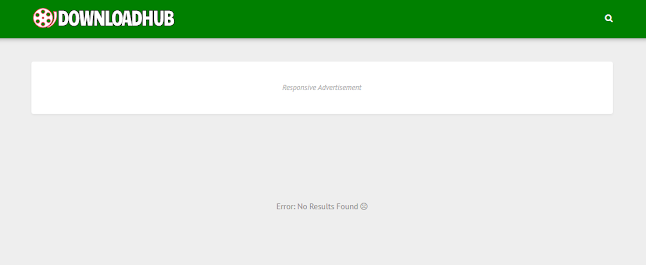
Step 5: We remove all pre-installed menus and submenus.
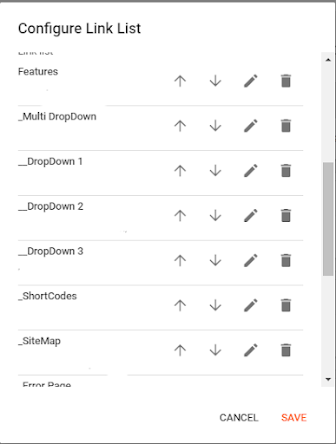
After deleting the link list, it looks like this
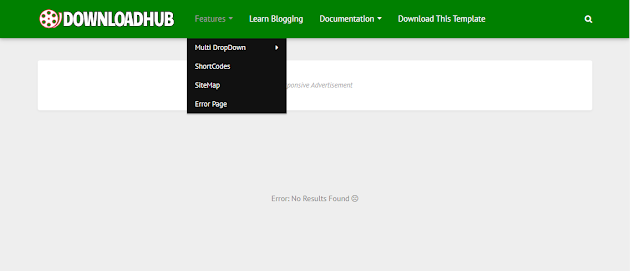
Also, the blogger navigation menu looks like this
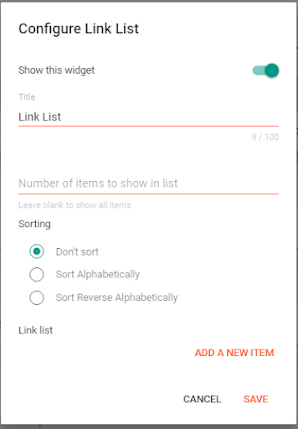
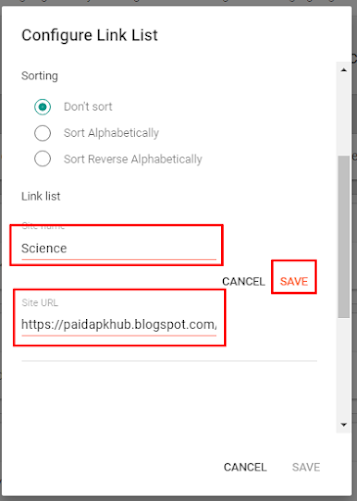
In the "New Site Name" tab, enter your label name, for example, Tree
On the New Site URL tab, paste the URL of your label name (Tree) you want to add and click the Add link.
Note: To change the position of the label in the list of links, you can use the UP and DOWN arrows provided after the Delete button in the image above.
Just enter / just for the homepage URL.
However, for all other labels, type the full name of the label in "New Site Name" and then paste the URL into the "New Site URL" tab.
To copy and paste the URL of this label, you need to open this label on your blog by clicking on the name of this label which is present as a label or tag in your post.
Let science, for example, be your label for navigation menus. Then click the scientific tag or label on your blog and copy the full URL of the label, like here

You can also change it later, like this
Step 7: For every 2 dropdown labels, add a double underscore__ in front of the label name in "New Site Name", then paste the URL of the label as in the previous process.
Using this method, create a name for this label on the New Site Name tab, then paste the URL of this label on the New Site URL tab and click Add Link.
If creating drop-down labels 1 Add one underscore before this label, or if adding 2 drop-down labels, add two underscores and paste the label URL into the New Site URL as well.
Once you have created this list of links, go to your blog and take a look at the navigation view. This is what your navigation menu looks like
That's it, you have successfully created a blogger drop-down navigation menu with submenus.
Thank you for being with us!!
Sharing is the cure!!


Comments